
https://youtu.be/Jar8v89imbo?list=PLqcjDvhaF8_iroTlS5OC5CpYgg-Vx85va
Summary :
what do you have to do dirst of all you haveto select on the Upper part and Lower Part.
then shift +S -2(cursor to selected)
then it represent
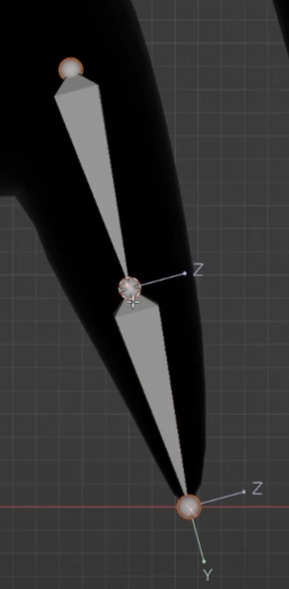
for the purpose of locating at middle point.
this middle point will be perfect between those two points
on the x and z where it should be eventually.

Make sure you have a light bend forward here.

1. Orientataion->Global
2.Pivot point -> median point
3. Create Orientation form this bone.

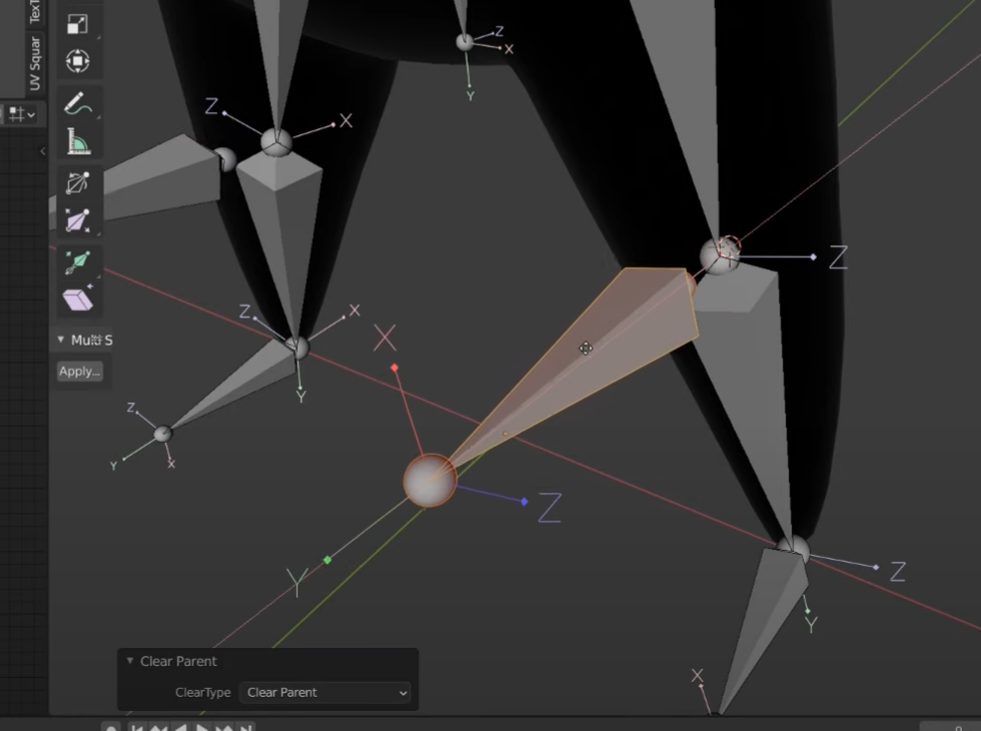
moving it out on the same axis
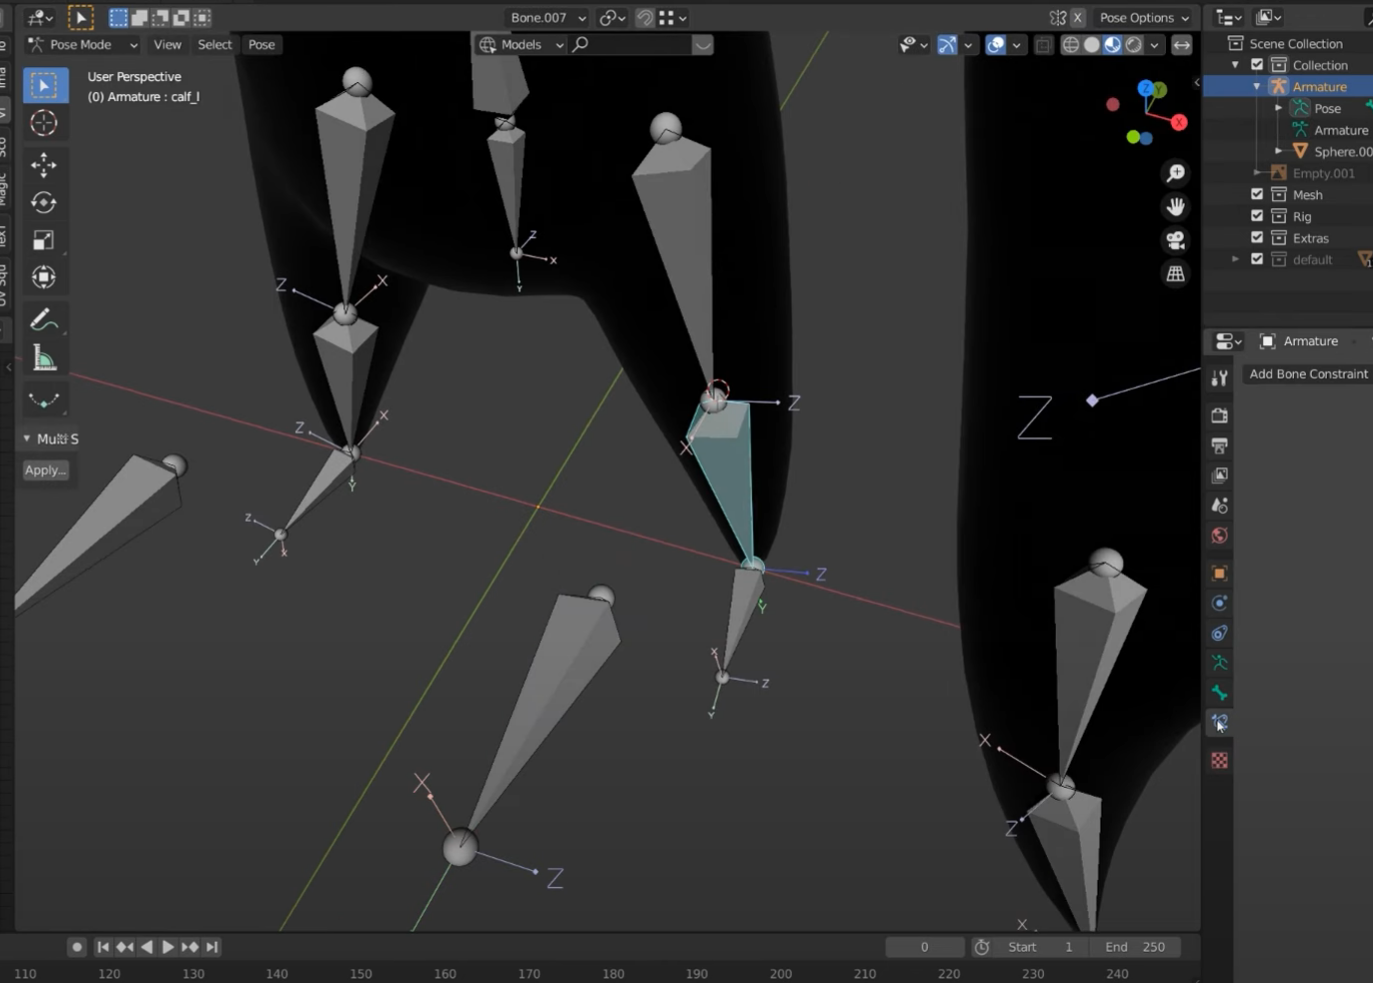


Now, 1. go to pose mode
2. Bone Constraint properties
3.Inverse Kinematics
4. chain Length -> 2 (1은 자기 자신의 헤드 인거 같고,2 부터 부모의 헤드인거 같다.)
5. Target - > Armature
this is the chain length it doesn't know how long we change it
,and we have only two legs here
6.then we need to select target bone
So, you should rename bone
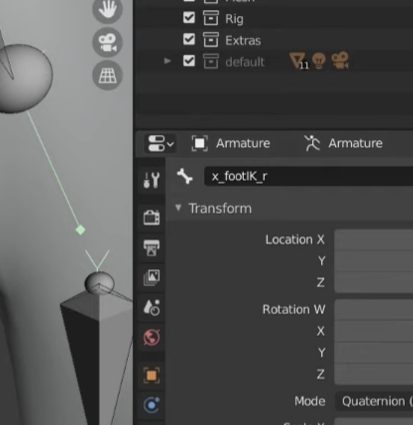

7.then set the bone to x_footIK_l that we made just right before
IK completed, if we move the IK bone other bones will follow Ik bones

8. assign Armature and Bone for the purpose of reversing bone,opposite,contrary, other way
IK 일때 무릎을 컨트롤 하기위해 Pole Target을 사용
when Ik is used, it needs Pole target for reversing knee.
5:02
Now, we can do one thing let's select our control bones
uncheck


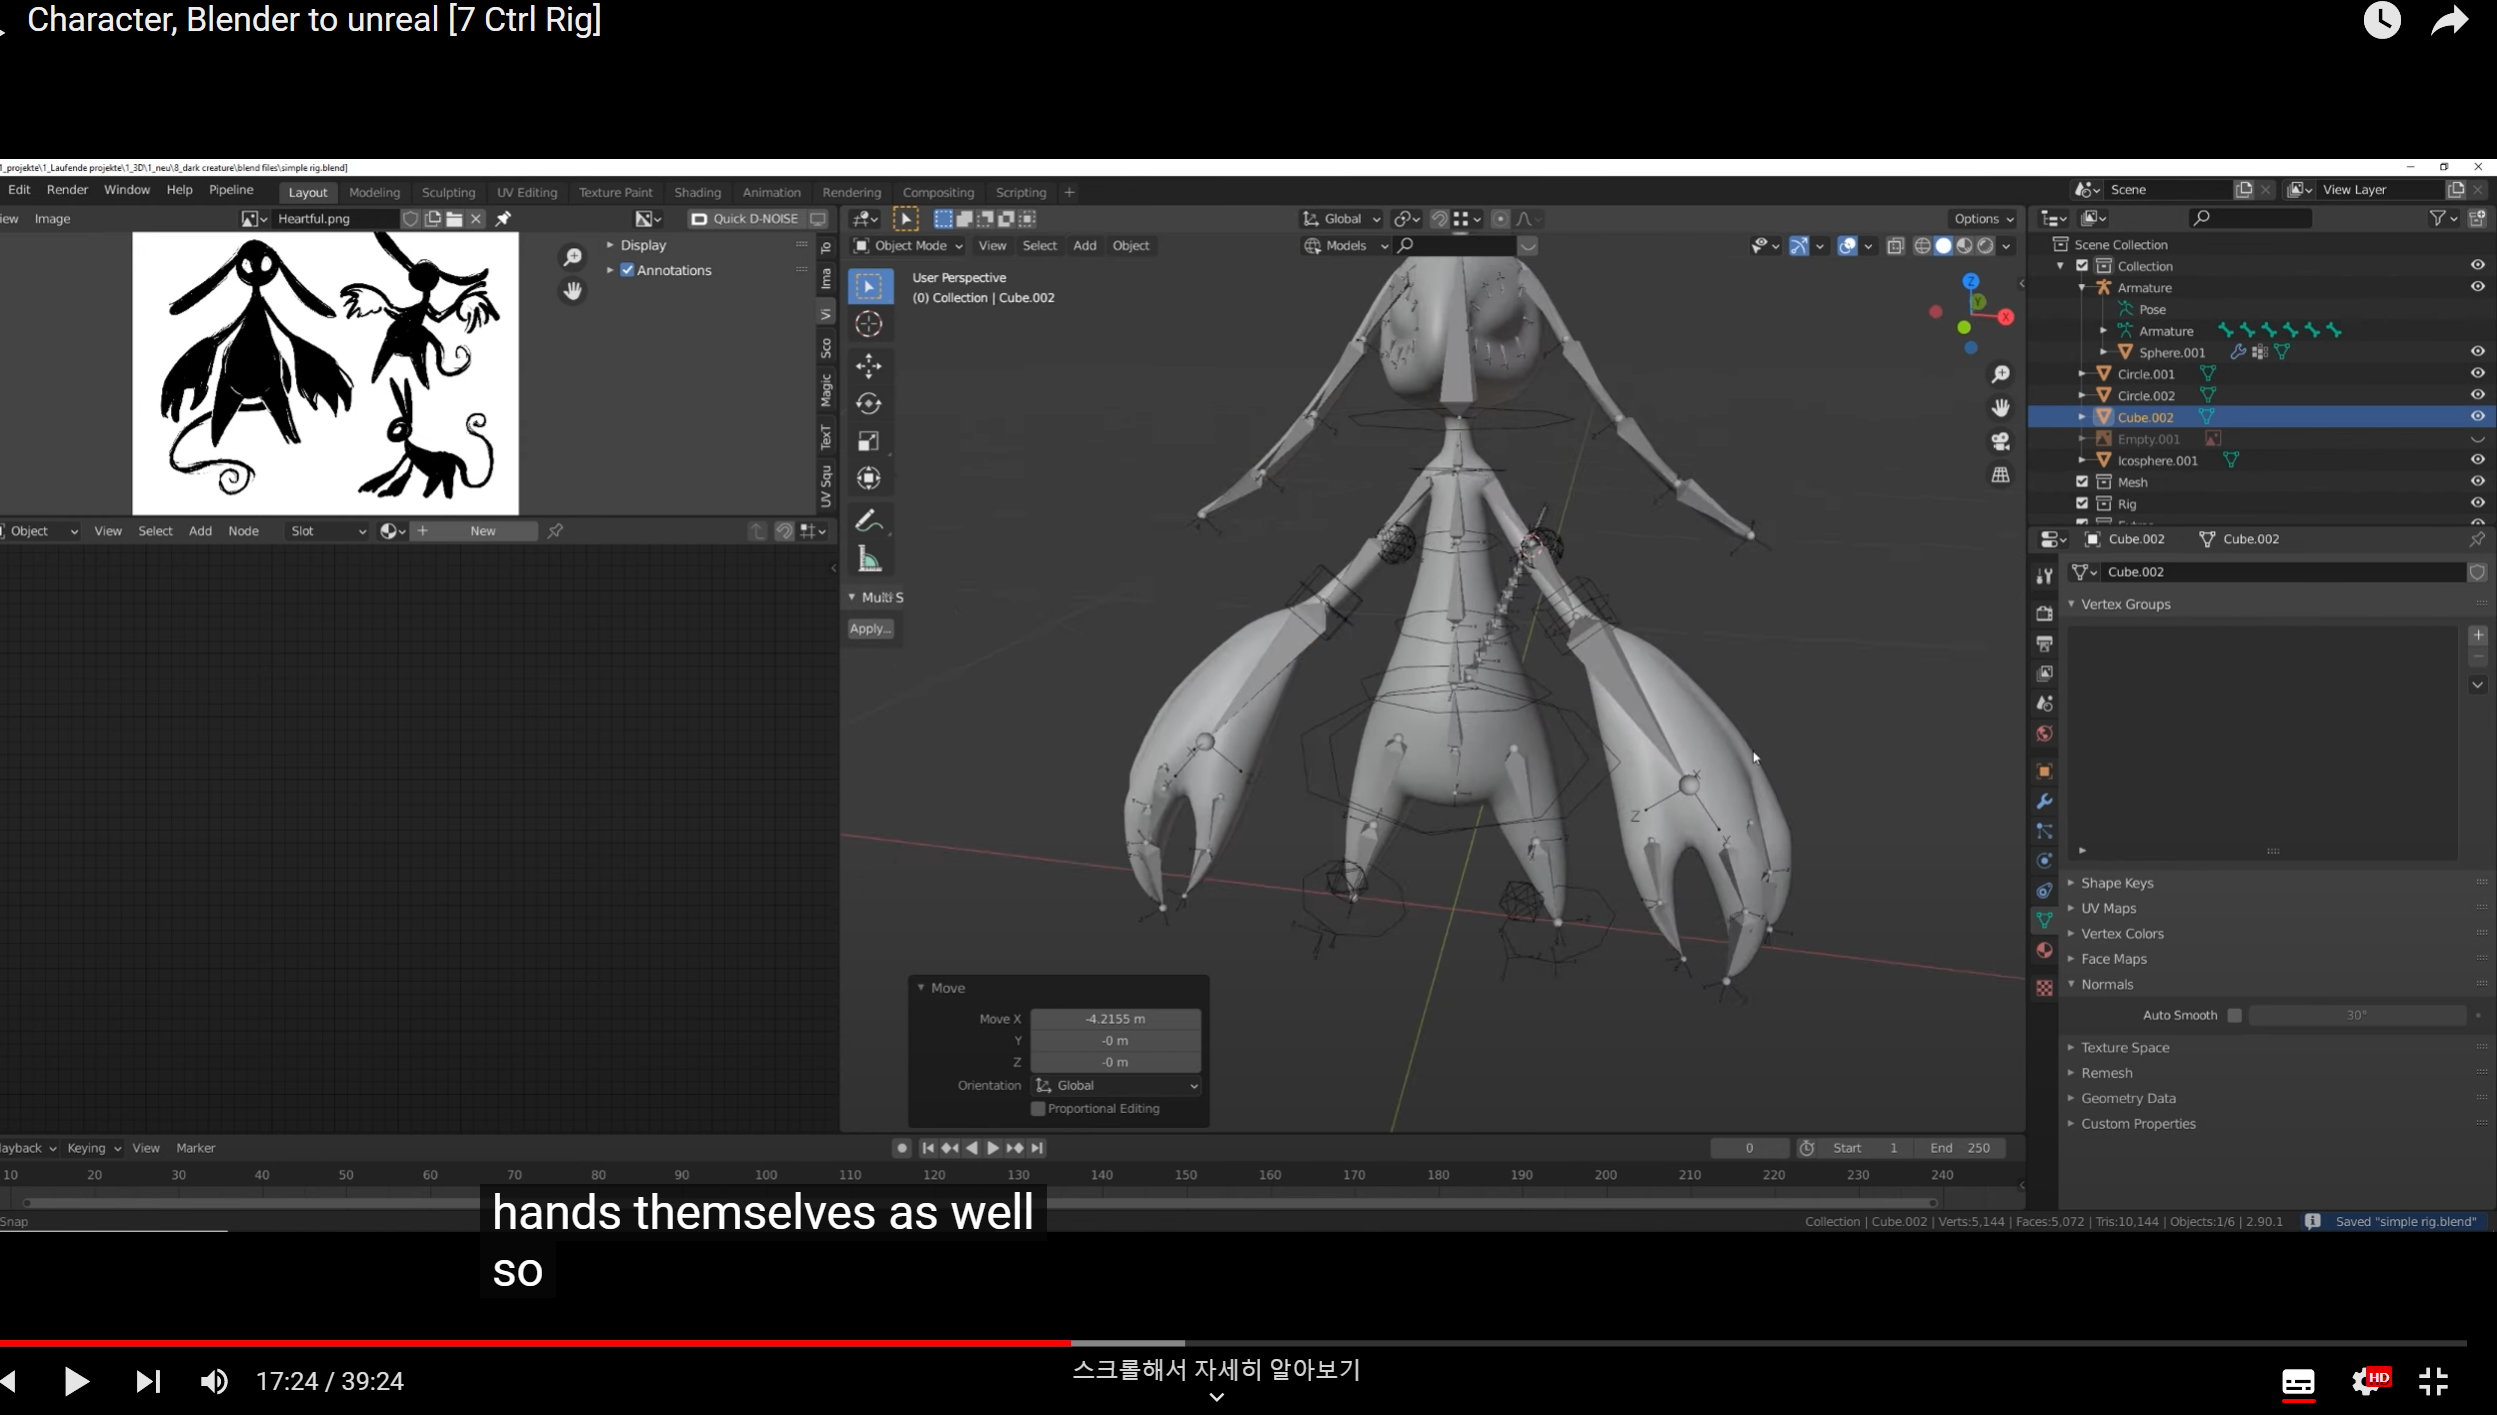
레이어를 통해 Deform bones 들을 분류해주고
Via the layer, sort the deform bones.
I want to give those a lttle bit of a form

포즈모드에서
Viewport Display- >Custom Object

사이즈나 그런것들을 조절하면 된다.
7:35

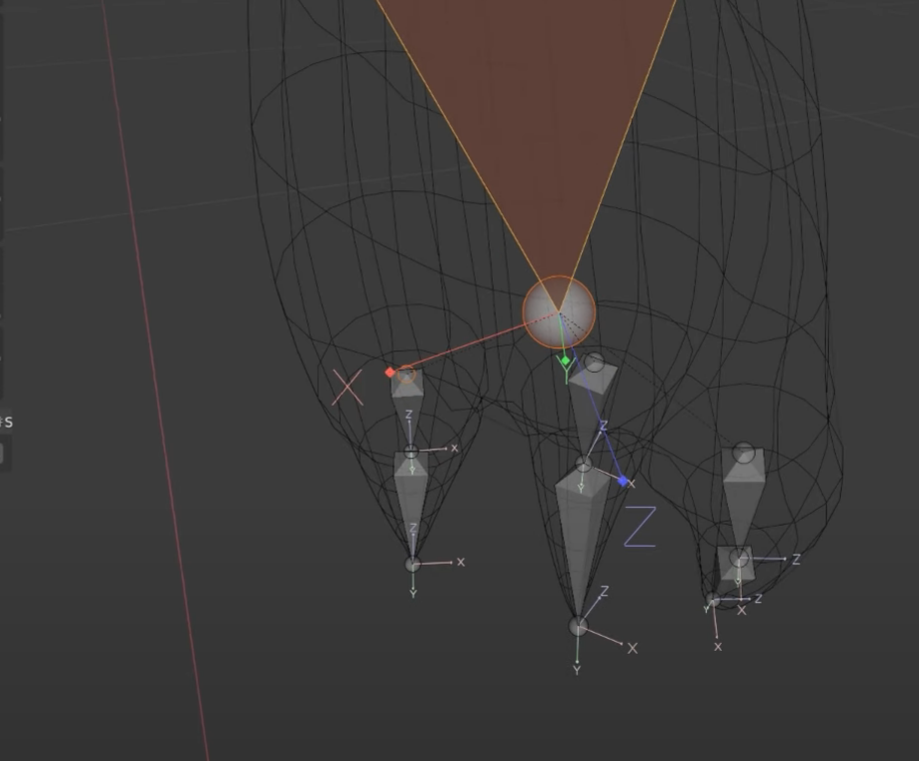
팔들도 pole을 해주고
8:56
9:22 팔꿈치 본을 뒤로 빼 좀 각도(Angle)을 지게 만들어야지 포즈를 수정하기 편하다고한것 같다.

팔도 pole 과 IK를 keep offset

11:53
In the end I am going to recheck everything uncheck deform bone.

12:04 Duplicate를하고 M을 눌러 새 레이어에 넣었는데 이걸 어디다 쓸련지?
13:17 새로 Duplicate 한본에도 Custom Object로 만들어준다.

14:16
Copy Transforms
Root와 Pelvis의 Ik를 만드는 과정
이렇게해서 연동을 시켜준다.
I am doing this because controls the rotation of the arm..

18:02, Z Axis가 손이 봐라보는 방향으로 제대로 안되있다는거 같다.
18:44 새로운 본 x_hand_l.001 추가 ->x_fist_l
19:30 Transformation
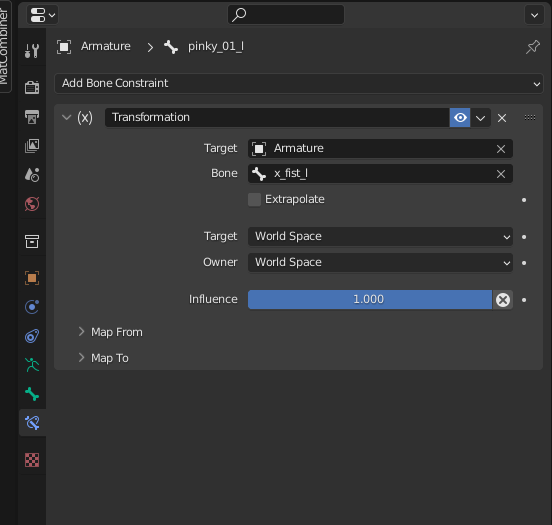

을 시도 해볼려했는데 잘 안됬다.. 나중에 한번 다시 체크해봐야 할것 같다.
23:41 if we see arm ik does not follow this
but this is root has to follow this.
Ik들을 루트 IK로 따라가게 만들어줌
24:58 에서 커스텀 캐릭터는 가운데에 있는 spine을 따라가게했지만
왠지 calvicle들을 따라가게 해야할꺼 같은데 인간형 캐릭터들
25:19

26:05
this is actually useful when we do differnt things
like walking on four legs

set inverse는 current position을 설정하기 위한것
Influence를 0으로 설정 - > 1로 되돌리기전에 Set Inverse를 하면 팔은 그자리에 계속 있다.
28:33

32:37
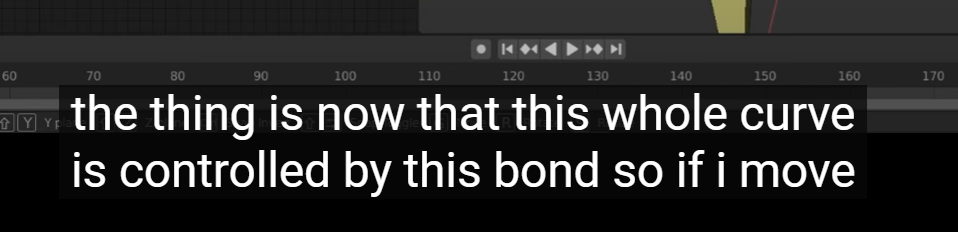
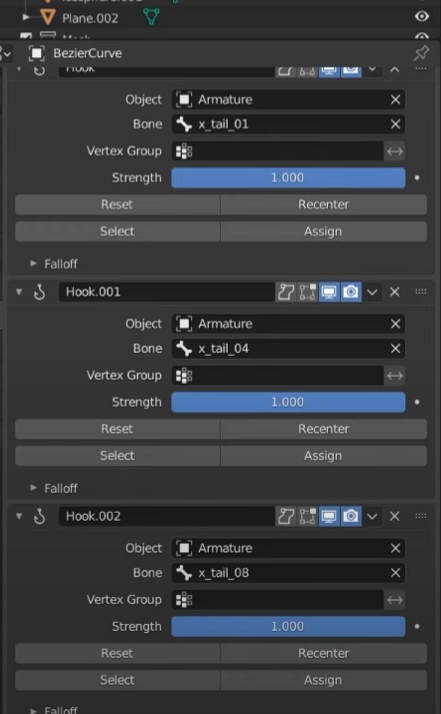
Ik에 의해 커브가 제어 된다는거 같은데..
32:58 커브의 버텍스를 선택후 Assign을 해야 버텍스 그룹인것 처럼 된다고 설명
the bone controls the one vertex of the bezier curve

'Blender_Study > Blender_Animation' 카테고리의 다른 글
| Blender VRM 리깅 최신 정리 (0) | 2024.07.19 |
|---|---|
| Blender to UE4 animation Pipeline_02 (0) | 2022.12.24 |
| Blender to UE4 animation Pipeline_01 (1) | 2022.11.18 |
| Rigging a character for Unreal Engine 4 with Blender, Rigify and Uefy 2 -2 (0) | 2022.05.25 |
| Rigging a character for Unreal Engine 4 with Blender, Rigify and Uefy 2 -1 (0) | 2022.05.25 |


