
시작하기전에 앞서 OupPut 프로퍼티들으 전반적으로 살피고자 한다.

전반적으로 여기서 OupPut 프로퍼티들으 전반적으로 살피고자 한다.
(해상도란 쉽게 얘기하면 얼마나 선명하고, 디테일한 화면을 구성할지 보통은 1920 1080으로 FUll_HD로 제작하는것 같다.)
카메라 해상도
Frame Start
Frame End
Step(이 기능은 무엇인지 모르겠다.)
the number of skip forward
while rendering/playing back each time.
매번 랜더링하거나 뷰포트에서 재생할때 스킵한다고 하지만 어떨때 스킵하는지는 모르겠다.

The Time line is the first animation editor that I would like you to get to know.
as you will find it invaluable when you are animating.
The timeline let's us quickly see where your keyframes are,

scrub your animation ?? 아마도 애니메이션을 수정해서 좀 더 좋게 만들거나 그런뜻으로 추정된다.
It gives us a borad overview of our animation by displaying the keyframes for the selected objects

or the selected bind when you are working with armatures.
I will explain difference between objects and armatures later in the course.
You also might notice that I am already starting with a timeline(clock 모양,시계 모양) is,
already has keyframes in it.


Playhead,
You can see the little number inside that. That is the current frame.
it says number one.


Now, to scrub the timeline, there's two ways of doing it, you can click anywhere
inside this black area

just by click and dragging


내 설정 기준으로는 플레이는 shift + space
playhead 이동은 shift +right click
화살표로도 playhead를 이동 시킬수 있다고 한다.
If you wanted to jump to the next keyframe, which are these diamonds here,
Just press the up arrow, that will jump to the next keyframe,
however, far away that is, and the Down Arrow will go back to the previous keyframe.
If there is no more keyframes to go back to, you will get a little warning here and the same
is true,

다야몬드 키 끝과 첫으로 이동하는건 아니고 그냥 Output Property에서 설정한 1 과 250으로 이동하는거다.
So if you hover them,you will see the data, what the shortcuts are for.

I will go over this one, this is a very special button called Auto Keying, that one will have
it's own little video later on in the course. (이거에 관해 따로 설명해주겠다는 뜻)

and that will play our animation then hit ESC(cape) to stop it or we can use the shortcut,
which is just Space bar by default settings
ESC 와 Space bar 에도 차이가 있다.
ESC는 플레이를 시작하기 시작한 부분부터 돌아오지만
Space bar는 (내 설정에서는 shift +space bar)여기서는 멈춘 부분부터 시작한다.
Now if we wanted to play the animation backwords, we just hit Control + Shift + Spacebar
그리고 잠시 이거를 누르면서 잊은게 있는데 한가지 창을 확대하는 단축키는 Ctrl+spacebar 이다. 중간에 키 하나가 누락되면, 원치 않는 상황이 되니 주의하자

Now the current frame or the playhead can also be manipulated over here,

You can click the Arrows to go forwards and backwards,
or you can click and type the exact frame number that you wanted to moved to.


Start frame 과 end frame을 Output property 뿐만 아니라 여기서도 조정할수 있다고 말하는것 같다.
But you can start any frame you wish but let's keep it simple and start on frame one.

You can also set the start or the end frame to be the current frame of our animation really easily
inside the timeline.

To do this, first go to the frame that you want and press Control +Home.
and Control + End will set your end frame.

여기서 아까 말했다 시피 맨처음으로 이동하는 Shift + left arrow를 하면 14로 이동한다
복습
다음 프레임 이동은
이전 프레임 이동은 left key and right key
이전 키
다음 키 이동은 Up key and down key
Set the global start : Ctrl +Home
Set the global end : Ctrl +End
정지에는 두가지 종류가 있다 ESC 키, shift +space bar
그리고 뒤로 반대로 재생은 CTRl+ shift+space bar
파랑색 부분으로 표시된 현재 실행되는 애니메이션 부분은 Play head


If you wanted to create a temporary start and end to foucs on a certain section of the animation
without affection the global settings, you can do that by clicking the stopwatch here,

you can do that by clicking the stopwatch here, which will activate the preview range,
then we can use all the same hotkeys to focus on the area we want to work on.

And when we play our animation, it is just going to loop over that section that we specified.
We can deactivate this by clicking the stopwatch,

Now, We are back to our global settings, which are the ones that will be rendered out into your final animation.
아마 결국에는 저것은 구간을 설정하면서 보기에는 편하다는 뜻이고 결국 마지막 출력물과 혼동하지 말라는 의미에서
이말을 덧붙인것 같다.


You can also quickly activate the preview range by pressing the P-key
and then selecting the range that you want to work on.

Alt +P to deactivate this

You can adjust the view of your timeline to translate and zoom it in any way that you like,
which is something that you do quite often. Scrolling the Middle Mouse and down will
zoom in and out.

MMB 로 Time line 왼쪽 오른쪽을 자유롭게 이동 가능하다.

Control Middle Mouse dragging 도 왼쪽 오른쪽을 이동하는 역할이다.

which will let you translate the view.


Now, If your view ever gets our of whack, you can always press the Home key
and it will zoom to fill the available area.

Or if you have some keyframes selected, you can just press the Numpad period(.) or the Decimal point
키프레임을 확대 시키는 기능이다.

The Numpad zero will center the view around the playhead.
Play head를 기점으로 주위를 보여주는것 같다 확대 기능은 없는듯 하다.
자주 쓰일 단축키일것 같다.

Now if you ever lose your keyframes, which can happen sometimes, when you accidentally
translate them out of view like this


마우스 미들 버튼을 누른채로 이동하다가 실수록 아래로 끌고 갈경우를 말하는것 같다.

Don't forget you can always the Home key to figure out exactly where you are.

Now, there are many different ways that we can select our keyframes inside our timeline editor.
The first way I want to show you is how to select everything. That is really easy, just by pressing
the A-Key, and that will select all of the visible keyframes
if you want to deselect everything just hit Alt +A or press A twice.
Alternatively, we can just double tap the A quite fast and that will toggle our selections.

Another way to select keys, is just by individually selecting them just by left clicking by default, right clicking for me,
so we can just select any keys that we wnat here,
그런데 로케이션 트랜스 포메이션을 개별적으로 선택해서 수정하는 방법은 어디에 나와 있는지 모르겠다..
일단은 아래 방향으로 된 한줄씩은 선택이 가능하다는것은 알겠다.

If you want to select Invert just press Ctrl +I
Box selection : Press B or Shift + drag
그냥 셀렉션 하고 박스 셀렉션이 차이가 있다면 중첩으로 선택이 가능하다는 점인거 같다.

Now let's say I wanted to select everything on the right of playhead.
Well, we can do that easily just by pressing the Right Square Bracket, which is ]
Left is also same.

although it has one minor difference. Let me just deselect everything. If I hold down the Ctrl + Shift
and then I click on the side of the playhead
차이점이 있다면 대부분 Shift 키가 포함된 키는 중복으로 겹쳐서 선택이 가능하다는 것이다.
이것또한 예외는 아니다. 또 다른 차이점이 있는데
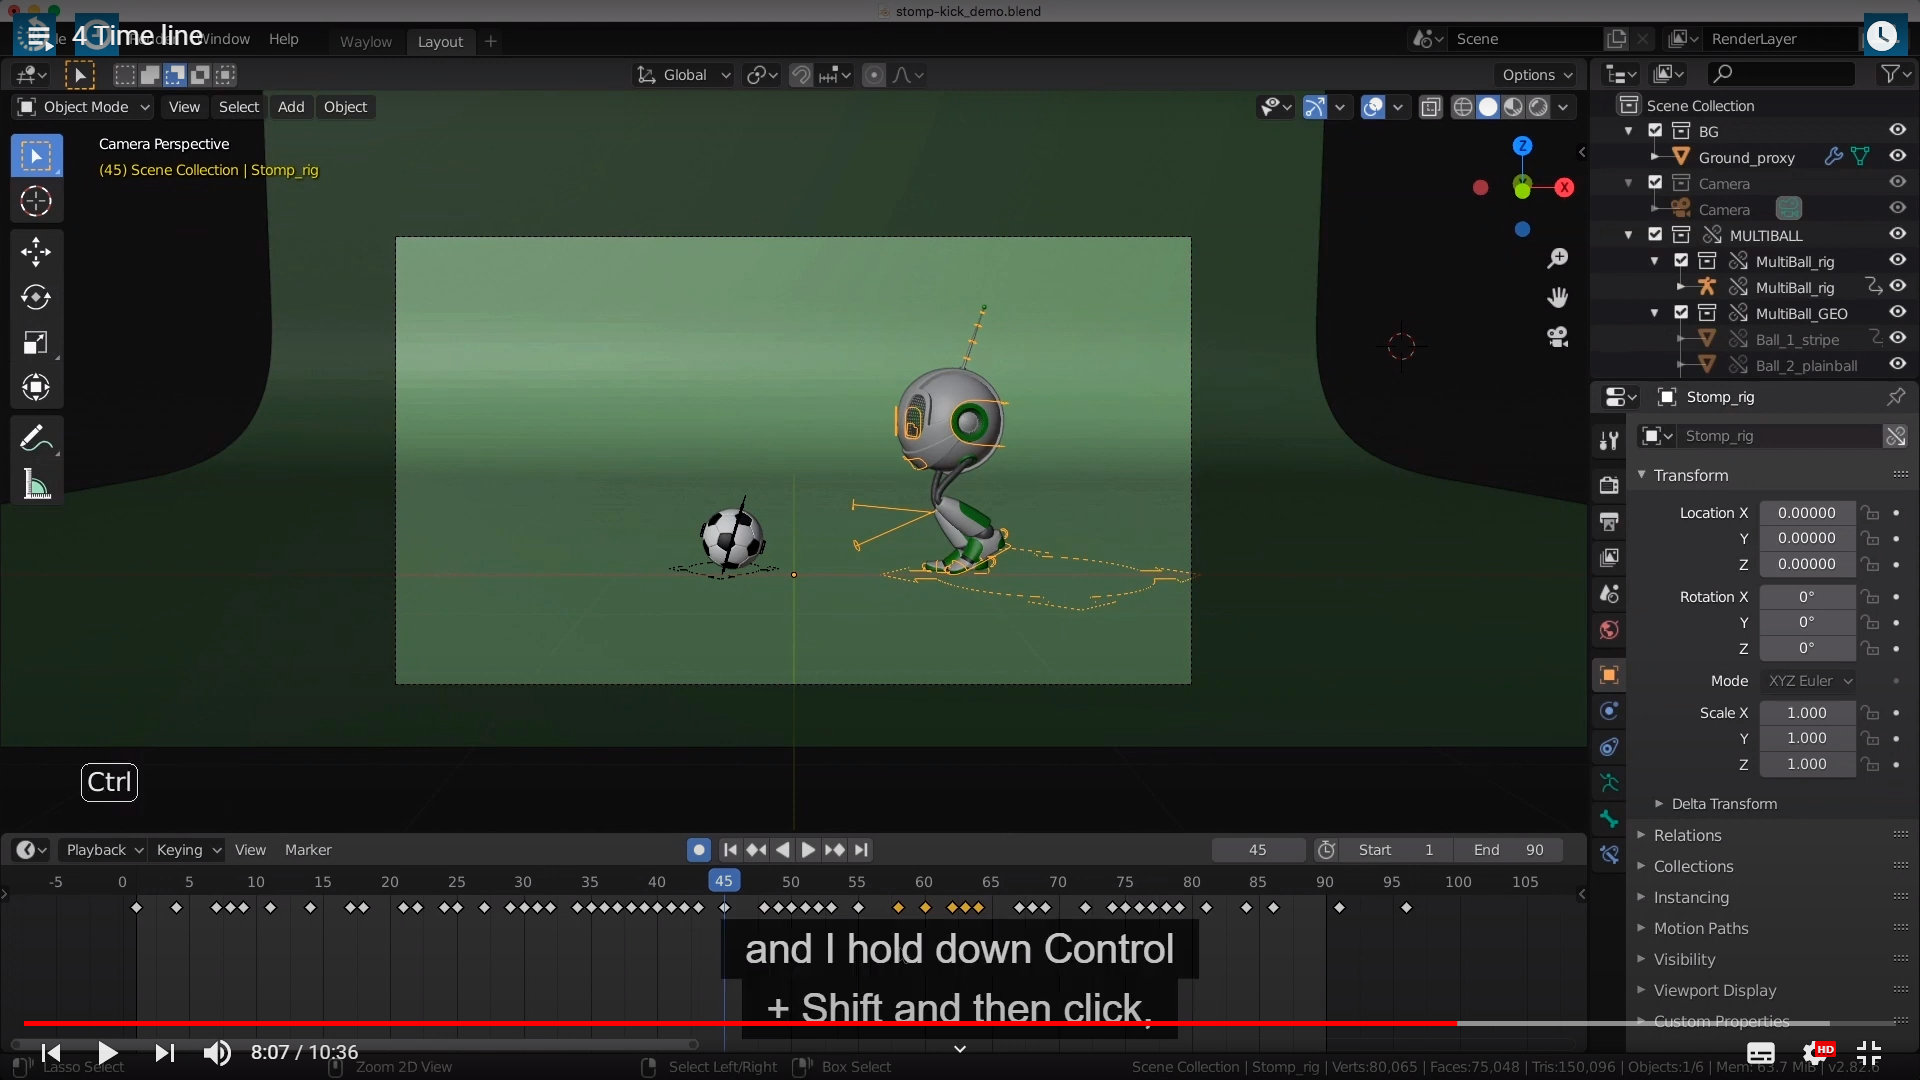

이런식으로 Shift +Ctrl +Click 을 하면 이미 선택된 키들이 교체 되면서 선택이 안되어 진다.

To manipulate keys, you need to first select the keyframes that you want to manipulate.
Then you can press G to grab and move them around.

and this works relative to the position of the playhead.
So if it's over here, it will scale from that position.


근데 이렇게 하면 Shift +Click 으로 오른쪽을 선택한 다음에 G로 이동시키는거랑
그냥 전체를 선택하고 Playhead 옆쪽 기준으로 E키를 눌러 Etrude 하는거랑 별차이 없다.

and this will shift all the ones on the left. This is a really good way to adjust the timing
of your animation while not having to constantly select and deslect stuff, as well as
without scaling your keys.
You will see these more in action later on.


End key 가 아니라 M key 다.

Ctrl +M 으로 리네임


삭제는 delete 또는 x 키로


여기 view에 보이는 기능을 설명하는거 같은데 별거는 없고 여태까지 설명한것과 프레임 별로 디스 플레이 되는게 아닌
초단위 와 프레임이 함께 보이게끔 설정하는거다
단축키는 Ctrl +T 이다.


여기까지해서 대략 전반적으로 블렌더 timeline 애니메이션 단축키들을 살펴본거 같다.
꼭 열심히 해서 제대로 된 결과물을 추출해냈으면 한다. 화이팅
'Blender_Study > Blender_Animation' 카테고리의 다른 글
| 12_Graph_Editor_and_Interpolation (0) | 2021.05.01 |
|---|---|
| 10 Outputting Animation (0) | 2021.04.26 |
| 8 Animation Practice,9 Auto Keying (0) | 2021.04.14 |
| Animation_Fundmentals_2021.04.05(Keyframes and Channels) (0) | 2021.04.05 |
| Animation_Fundmentals_2021.03.11(Frame rates) (0) | 2021.03.11 |


